All Categories
Featured
Table of Contents
- – Rv Service And Repair Near Me Brea, CA
- – OCRV Center
- – Motorhome Generator Repair Near Me Brea, CA
- – Rv Repairs Near Me Brea, CA
- – Motorhome Repair Shop Brea, CA
- – Rv Generator Repair Brea, CA
- – Rv Mechanics Near Me Brea, CA
- – Full Service Rv Repair Near Me Brea, CA
- – Motorhome Refrigerator Repair Brea, CA
- – Rv Plumbing Repair Near Me Brea, CA
- – Rv Plumbing Repair Near Me Brea, CA
- – Motorhome Repair Shop Brea, CA
- – Rv Repair In My Area Brea, CA
- – Full Service Rv Repair Near Me Brea, CA
- – OCRV Center
Rv Service And Repair Near Me Brea, CA
Epoxy was poured into molds on the ground before being set up on the ceiling. The rest of the ceiling was painted "Iron Ore" in shade and LED rope lights and light wood trim were included.
Picture Credit History: Kento Eyre In this Motor home restored by the pros at Wayland Ventures, simple discolored 2x6s create beams that run across the ceiling.!! To cover up the normally bent roof covering of the bus, owner Andy installed wood paneling across parts of his Motor home ceiling.
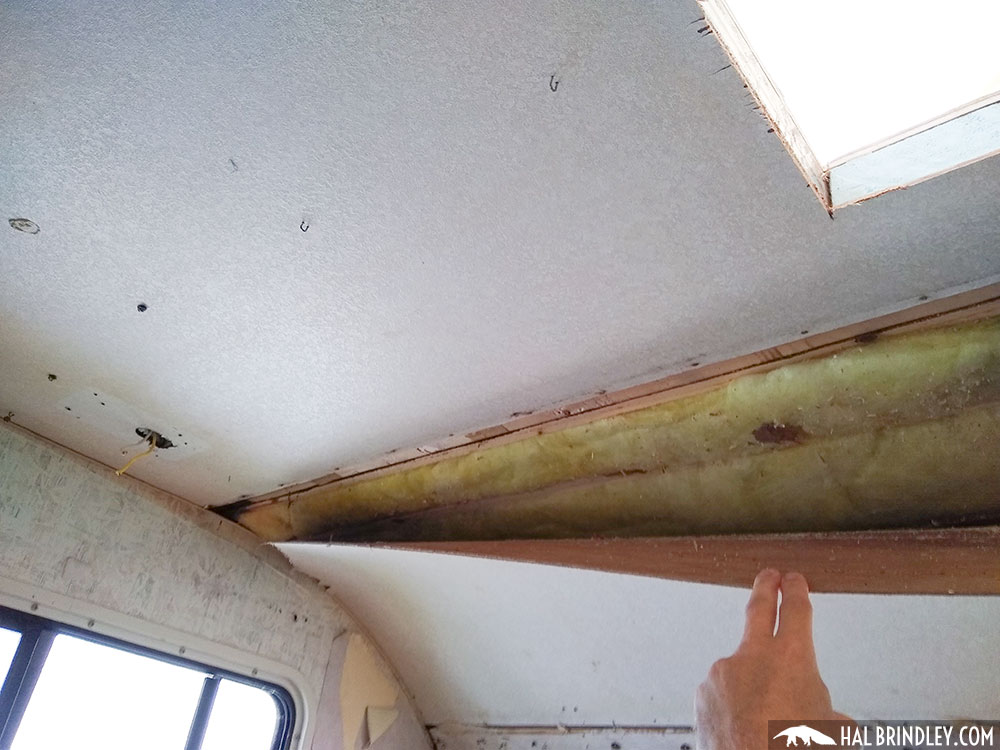
Photo Credit History Terri Closs Below is what the proprietor, Terri, had to say regarding this ceiling! "Tin ceilings are notoriously hefty.
Motorhome Generator Repair Near Me Brea, CA
"That ceiling floor tile was framed by timber molding down the length of the trailer with a versatile material molding adhering to the contour of the ceiling. How do you hold these ceiling floor tiles in place while the adhesive dries out?
For an added basic ceiling remodelling, consider including components like a ceiling follower or a lovely lighting fixture. This can include both charm and function to your ceiling. Image Credit rating: kevinodonnell143 You can use any type of type of residential light fixture in a motor home as long as it is effectively mounted.
Image Credit Report: Camp Revival Would you remodel your RV ceiling? Alyssa Padgett is the writer of the best-selling publication, A Newbie's Overview to Living in a Recreational vehicle (Rv Repair Centers Near Me Brea).
Rv Repairs Near Me Brea, CA
Still that will certainly supply all the rainfall defense I require to maintain the roof dry. Below is my Recreational vehicle canopy with the sidewall enclosure set mounted.
This produces a lamination effect (like adhesive in between layers of plywood) that develops a single stiff structure. Prior to I began taking apart the roof covering I can jump about on it and feel no flex.
This suggests that in order to keep a solid and lightweight roofing system,. Possibly your Recreational vehicle is made with wooden 24 roofing system framing rafters and has thicker plywood outdoor decking on top.
Motorhome Repair Shop Brea, CA
Since I can see just how the roof covering of the motor home is developed and the extent of the water damage, I have some crucial decisions to make about just how to continue with my recreational vehicle remodelling. Just how much do I intend to fix/replace and in what series? It's time to make a tactical plan for my recreational vehicle remodel! roofing decking plywoodceiling inside RVcabover bunk (the bed location over the taxicab)ceiling and roof in rear rounded change of roof (over restroom & closet)some framing in sidewalls alongside roof covering Then I need to consider my objectives and attempt to stabilize them all.
yet yet yet And lastly, I need to determine the, so I don't repair something and after that have to undo it later on for the next repair. Improvement projects are like a video game of chess; you have to anticipate 10 steps ahead to avoid screwing on your own in the process.
I can inform due to the fact that the grooves cut into the styrofoam for wiring go to the top of the foam and would have been difficult if the roof covering was currently on. So if I replace the roofing first and afterwards intend to change some wiring in the ceiling later, just how would certainly I get to it? (I would probably wind up placing hideous surface-mounted electrical wiring tracks in. Rv Repair Centers Near Me Brea.) An additional sequence issue is whether to do the? I can see that the bent fiberglass panel at the top of the over head bunk location overlaps the roof covering decking and the rubber roof.
Rv Generator Repair Brea, CA
This seems like a crazy choice to me and method extra work than necessary, but it is still an alternative, particularly if the water damage in your recreational vehicle is extra comprehensive than mine. This would certainly call for, and possibly (like the bathroom wall and wardrobe walls) but leaving all the metal roofing framing in area.
Then place new layer of EPDM rubber roofing on the top. This would certainly most carefully re-create the initial top quality of the manufacture, would certainly be the lightest possible repair work and the toughest roof lamination. A significant amount of work, disassembling cabinets and indoor wall surfaces, as well as a great deal of getting rid of circuitry and components.
After that you could end up building cupboards from square one. Most expensive choice. PUT An AESTHETIC LAYER OVER CEILING, SECONDLY LAYER OF ROOF PLY. This would be the most convenient alternative, simply reduced items of thin paneling to cover the whole ceiling (without eliminating closets or wall surfaces). Lay a 2nd layer luan plywood over the old roof substrate to cover up damaged locations.
Cheapest, simplest, fastest. Will certainly look just as great inside as actually changing all the ceiling ply Much heavier since includes numerous layers of ceiling paneling and roof paneling. Much less stamina because there will certainly still be some delaminated locations of ceiling and roof covering decking. Most awful of all, I 'd be capturing in rotten timber in the ceiling that might be growing mold and mildew.
Rv Mechanics Near Me Brea, CA
I believe someplace between these 2 extremes might be my ideal choice. I could change all the 1/8 roofing system paneling with complete sheets and adhesive it as well as feasible for a full toughness roofing system, complied with by new EPDM roof covering. For the interior ceiling I would carefully cut out sections of the ceiling plywood that had water damage and came unglued from the foam insulation, and replace them with meticulously matched pieces of the very same density 1/8 luan plywood, and glue them to the foam as ideal I can.
Then, because there would certainly be a functional however crappy-looking mishmash of ceiling paneling in place, I would put a slim cosmetic layer of paneling over the ceiling in between the closets in the living location. I can pick an appealing aged-wood or bead-board paneling that would look charming. I can either glue it as much as raise lamination toughness, or make use of removable fasteners in instance I intend to place circuitry or fixtures inside the ceiling later.
Full Service Rv Repair Near Me Brea, CA
But a minimum of this will obtain me going. OK, let's obtain back to it! Next I'm mosting likely to get rid of the damaged timber from the roof covering..
JimI can not envision why there would be wrinkles on the ceiling. I thought the ceiling panels were like paneling with a glued on surface on one side. Seeing wrinkles I might only think of a dripping roofing system somewhere.
Motorhome Refrigerator Repair Brea, CA
Please note: This message might contain affiliate web links, significance, if you click through and buy we (or those featured in this message) may earn a compensation at no additional cost to you. View our full-disclosure right here. Among the largest projects we dealt with last month was installing the brand-new ceiling panel in the motor home.
As you might recognize, a few months after we acquired our RV in 2014, we discovered a water leak can be found in via the skylight. This actually freaked us out due to the fact that while we were preparing to renovate our motorhome, we had not planned on taking on such an overwhelming task. We're simply pleased we found it before we began any type of huge jobs.
Rv Plumbing Repair Near Me Brea, CA
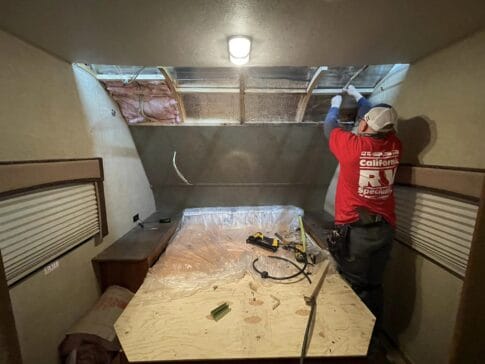
You can find out more about that right here. We had spent a fair bit of time tidying up the damages, re-caulking whatever to stop future water concerns, and setting up the new skylight. The enormous ceiling panel we had actually to have actually delivered on a products vehicle simply sat in our garage for months intimidating us every time we strolled past it.
There was lots of gauging, then re-measuring, after that re-measuring again prior to cuts were made, and there may have been a number of swear words also Abraham of The Strolling Dead would certainly be proud of. Eric was a champ and did most of the difficult work so I'll let him clarify just how we replaced our ceiling panel.
We are not professionals and replaced our ceiling panel to the finest of our ability with the support of our maker. As with any recreational vehicle task we advise you consult your producer for ideal techniques, this method you will certainly at the minimum obtain details straight from the equine's mouth in a manner of speaking.
With that said we really hope the details below is useful for you and your project. You can view our brief video clip listed below: Once we recognized we had water can be found in through our washroom skylight we immediately placed a tarp over the roof and called Tiffin, our recreational vehicle manufacturer. They were really helpful in walking us via how we can set about replacing the panel, yet there is only so much you can do over the phone.
Rv Plumbing Repair Near Me Brea, CA
Leave all of the wall surfaces and furniture in location and reduced the new ceiling panel into different items, after that placed them in area. Take out all of the walls and cabinets then place the brand-new ceiling panel in place as a whole sheet.
I had not been a huge follower of cutting the panel right into several items and fitting them around the wall surfaces that remained in area. I couldn't encourage myself it was the most effective choice, it may have extremely well been the most convenient, however I felt either of the other alternatives would be extra safe.
Motorhome Repair Shop Brea, CA
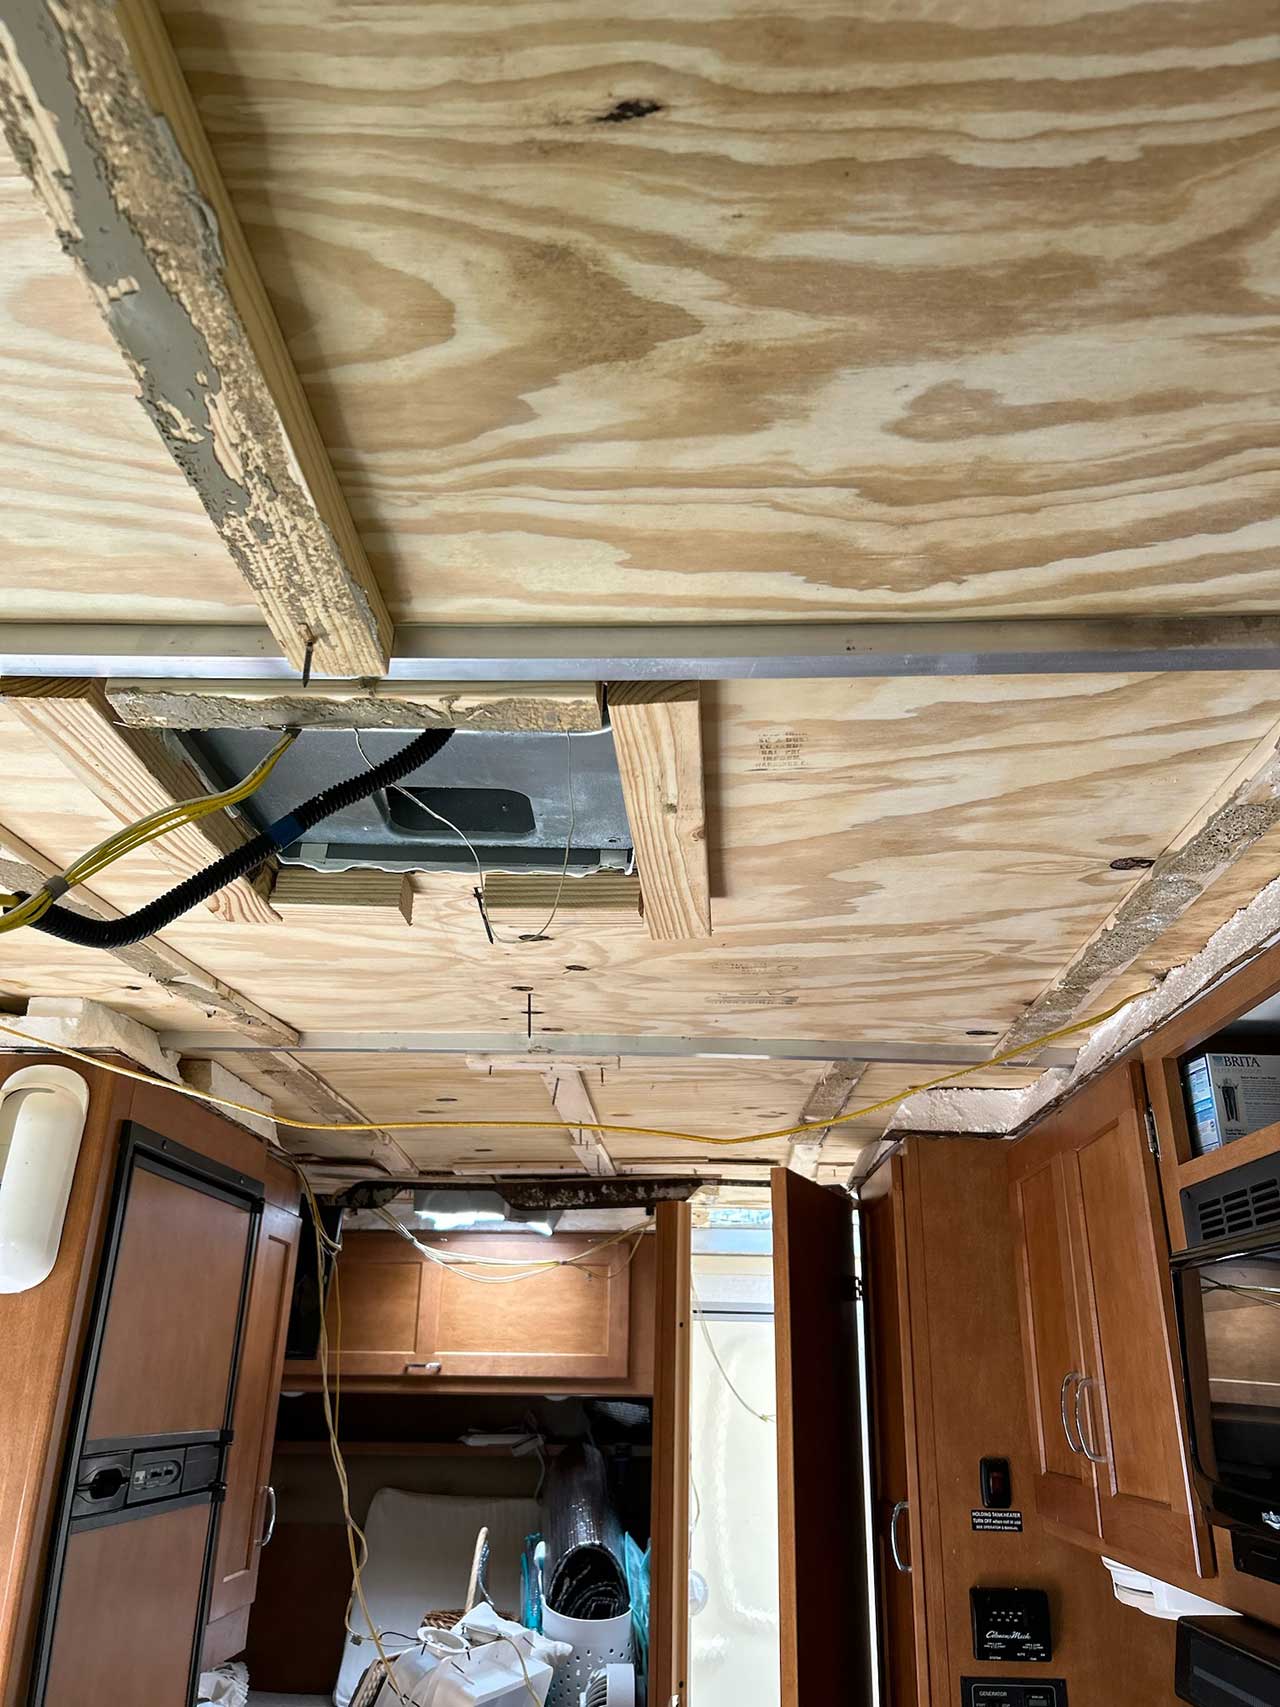
As we stood back and looked we chose it was going to be best to get rid of the wall surfaces and completely replace the panel in its entirety. As soon as we got to the main cooking area wall (the wall surface still up in the image above) we struck a pair of snags, specifically the hot water heater, and heating system were both set up versus the wall in the lower kitchen area cupboards.
When considering our ceiling with the old panel eliminated we recognized we had two walls that could essentially cover both the cuts we would need to make. One wall surface being the main cooking area wall, the various other being the hallway/bathroom wall surface. Side-Note: We understood we would not be removing the cooking area wall surface, however, we believed we may have the ability to glide the new panel (still unscathed) over the wall while it was still in position.
We chose to make the 2 cuts. I went ahead and gauged the distance from the edge of the panel to the middle of the kitchen area wall (insuring the cut would certainly be hidden under the wall surface). I additionally chose to do this because the wall surface would help work as a brace for the two items of paneling we would have after the cuts.
The same reasoning behind this cut as the various other, to see to it when the corridor wall was put back in position it would certainly align straight with the cut we made in the ceiling panel. (in the above picture you can see that the panel goes below the cooking area wall, creating assistance while likewise concealing the cut we made) So currently we have 2 items of the paneling and we understand where they are going to go, however what regarding the vents, skylight opening, and cables that need to come with the ceiling panel? It is best to get those spots gauged and pre-drilled before you put the panel up.
Rv Repair In My Area Brea, CA
Rather than separating the cords, I made a simple cut with my round saw to the pre-drilled hole so that I could move the wires into area. You may wish to detach the cables initially, and that would be completely fine, I would certainly state utilize your ideal judgment and do what seems right to you.
I did this to make sure that I might put the panel up and make certain my marks were ideal with the idea that if they were incorrect I can then use the appropriate dimension little bit and appropriate somehow if necessary. Good luck got on my side and all the dimensions were correct.
For the vent covers and skylight openings, I made use of a drill bit large enough to permit my JigSaw blade in. I decided to obtain the panel in position and safeguarded before cutting out the larger openings, I did this due to the fact that I really did not intend to pre-cut then involve discover it had not been aligned properly.
Full Service Rv Repair Near Me Brea, CA
Prior to we placed the adhesive on and placed the panels we in fact needed to reduce an extremely small of the sides off. When we had actually that achieved the panels glided up into placement, and we understood they would fit. We took our spray adhesive and covered both the ceiling and timber support of the panel, gave it a minute to end up being tacky after that pressed both pieces with each other.
Rv Delamination Repair Near Me Brea, CARv Delamination Repair Near Me Brea, CA
Rv Service And Repair Near Me Brea, CA
Motorhome Awning Repair Brea, CA
Rv Repair In My Area Brea, CA
Rv Service Repair Near Me Brea, CA
Rv Ceiling Repair Brea, CA
Rv Plumbing Repair Near Me Brea, CA
Rv Delamination Repair Near Me Brea, CA
Motorhome Generator Repair Near Me Brea, CA
Rv Floor Repair Near Me Brea, CA
Rv Repair Places Near Me Brea, CA
Motorhome Repair Shops Brea, CA
Rv Repairs Near Me Brea, CA
Rv Repair Service Near Me Brea, CA
Motorhome Repair Shops Brea, CA
Motorhome Repair Service Brea, CA
Rv Service And Repair Near Me Brea, CA
Rv Solar Installation Brea, CA
Motorhome Generator Repair Near Me Brea, CA
Rv Service And Repair Near Me Brea, CA
Motorhome Repair Shops Brea, CA
Rv Floor Repair Near Me Brea, CA
Rv Generator Repair Brea, CA
Rv Repair In My Area Brea, CA
Rv Generator Repair Brea, CA
Motorhome Repair Shops Brea, CA
Full Service Rv Repair Near Me Brea, CA
Motorhome Refrigerator Repair Brea, CA
Motorhome Repair Shop Brea, CA
Rv Repair Services Near Me Brea, CA
Rv Repair And Service Near Me Brea, CA
Rv Repair And Service Near Me Brea, CA
Rv Repair Services Near Me Brea, CA
Rv Repair Services Near Me Brea, CA
Rv Plumbing Repair Near Me Brea, CA
Motorhome Repair Service Brea, CA
Motorhome Refrigerator Repair Brea, CA
Motorhome Awning Repair Brea, CA
Rv Delamination Repair Near Me Brea, CA
Rv Service And Repair Near Me Brea, CA
Rv Generator Repair Brea, CA
Rv Ceiling Repair Brea, CA
Rv Refrigerator Repair Near Me Brea, CA
Motorhome Service And Repair Near Me Brea, CA
Rv Plumbing Repair Near Me Brea, CA
Rv Service And Repair Near Me Brea, CA
Rv Service And Repair Near Me Brea, CA
Rv Repairs Near Me Brea, CA
Motorhome Repair Shop Brea, CA
Rv Repair Shops Near My Location Brea, CA
Rv Solar Installation Brea, CA
Rv Ceiling Repair Brea, CA
Rv Repair Centers Near Me Brea, CA
Motorhome Repair Near Me Brea, CA
Rv Delamination Repair Near Me Brea, CA
Rv Service And Repair Near Me Brea, CA
Rv Service Repair Near Me Brea, CA
Motorhome Repair Service Brea, CA
Motorhome Repair Service Brea, CA
Best Rv Repair Near Me Brea, CA
Rv Repair And Service Near Me Brea, CA
Rv Generator Repair Brea, CA
Rv Repair And Service Near Me Brea, CA
Camper Ac Repair Near Me Brea, CA
Rv Repair Shops Near My Location Brea, CA
Rv Plumbing Repair Near Me Brea, CA
Rv Generator Repair Brea, CA
Rv Repair Places Near Me Brea, CA
Motorhome Generator Repair Near Me Brea, CA
Best Rv Repair Near Me Brea, CA
Motorhome Awning Repair Brea, CA
Best Rv Repair Near Me Brea, CA
Motorhome Repair Shops Brea, CA
Rv Repair Services Near Me Brea, CA
Rv Repair In My Area Brea, CA
Rv Floor Repair Near Me Brea, CA
Motorhome Generator Repair Near Me Brea, CA
Near Here Seo Services For Small Business Brea, CA
Close By Seo Package Brea, CA
OCRV Center
Table of Contents
- – Rv Service And Repair Near Me Brea, CA
- – OCRV Center
- – Motorhome Generator Repair Near Me Brea, CA
- – Rv Repairs Near Me Brea, CA
- – Motorhome Repair Shop Brea, CA
- – Rv Generator Repair Brea, CA
- – Rv Mechanics Near Me Brea, CA
- – Full Service Rv Repair Near Me Brea, CA
- – Motorhome Refrigerator Repair Brea, CA
- – Rv Plumbing Repair Near Me Brea, CA
- – Rv Plumbing Repair Near Me Brea, CA
- – Motorhome Repair Shop Brea, CA
- – Rv Repair In My Area Brea, CA
- – Full Service Rv Repair Near Me Brea, CA
- – OCRV Center
Latest Posts
Commercial Truck Repair Near Me Santa Ana
Rv Painter Eastvale
Replacement Rv Awning Foothill Ranch
More
Latest Posts
Commercial Truck Repair Near Me Santa Ana
Rv Painter Eastvale
Replacement Rv Awning Foothill Ranch