All Categories
Featured
Table of Contents
- – OCRV Center
- – What Are the Most Recurring Sprinter Van Chall...
- – Black Death Injector Issues and Blue Smoke
- – DEF and DPF System Failures Leading to Limp Mode
- – Glow Plug and Cold Start Issues
- – Turbo Resonator and Hose Leaks
- – Why Does Your Sprinter Van Enter Limp Mode So ...
- – Common Limp Mode Triggers in Mercedes Sprinte...
- – How to Safely Diagnose Limp Mode Without Gues...
- – Fast Fixes That Reset and Prevent Recurrence
- – Sprinter Service A vs Service B: What Is Cover...
- – Full Breakdown of Sprinter Service A
- – What Makes Service B More Thorough
- – Cost Comparison and Value for Southern Califo...
- – Collision, Body, and Frame Repair for Sprinter...
- – Frequent Collision Damage Types on Sprinter Vans
- – Why Specialized Sprinter Body Repair Is Essen...
- – How to Choose the Ideal Shop for Sprinter Van ...
- – Dealer vs Independent Repair Comparison
- – What Questions to Ask Before Scheduling Service
- – Red Flags to Watch for When Selecting a Shop
- – Prevention Tips to Avoid Typical Sprinter Van ...
- – Seasonal Maintenance Suggestions for Southern...
- – Mileage-Based Checklists That Deliver
- – Quality Parts Over Cheap Alternatives
- – Real Owner Experiences With Sprinter Van Repai...
- – What Improvements Can You Expect From Professi...
- – Typical Concerns About Sprinter Van Repair Nea...
- – Locations We Serve Throughout Southern California
- – Common Questions About Sprinter Van Repair Nea...
- – What are the most typical Sprinter van troubles?
- – How much does Sprinter repair near me usually...
- – What is included in Sprinter Service A versus...
- – Why does my Sprinter van keep going into limp...
- – Is independent Sprinter repair near me better...
- – What is the recommended service interval for ...
- – What triggers Black Death in Sprinter vans?
- – Is Sprinter collision damage repairable?
- – Is shuttle service available during Sprinter ...
- – Which shop is best for Sprinter van repair ne...
- – OCRV Center
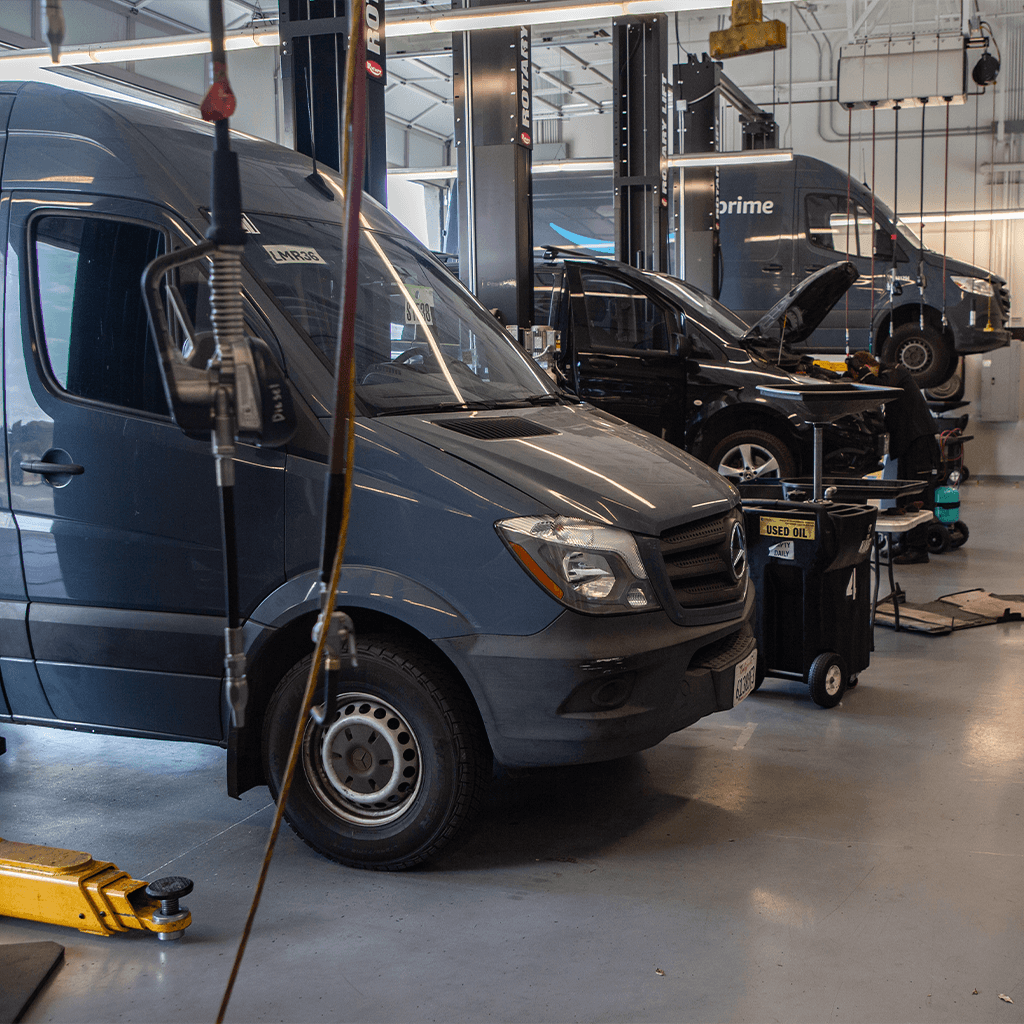
Sprinter van service near me becomes essential the moment your van hesitates, warning lights appear, or power suddenly drops while driving Southern California routes. Owners looking for dependable solutions need straightforward information about the most frequent issues, why they happen, and how to fix them quickly without excessive cost or long waits. This comprehensive guide explains the typical Sprinter van issues you are likely to face, the practical immediate solutions that work, and the steps that help you maintain control of your vehicle whether used for commercial deliveries, camper conversions, or everyday transportation. Understanding these issues early gives you the knowledge to act quickly and avoid the frustration of repeated roadside failures.
What Are the Most Recurring Sprinter Van Challenges Owners Deal With?
Sprinter vans are built for demanding work on Southern California highways, yet certain failures occur with predictable regularity for anyone searching Sprinter van service near me. Black Death injector leaks, DEF system buildup, glow plug failures, turbo hose leaks, and sudden limp mode consistently rank as the top complaints. These issues typically surface in vans with higher mileage when routine maintenance has been stretched or delayed. Recognizing early warning signs allows you to address problems before they escalate into major repairs that keep your van off the road for days or weeks. Local driving conditions near the 5 and 91 freeways, combined with frequent stop-and-go traffic, accelerate wear on critical diesel components. Fleet operators and individual owners alike report the same patterns because Sprinter vans endure heavy daily use in delivery routes, mobile businesses, and adventure travel.
Black Death Injector Issues and Blue Smoke
Exhaust smoke from the exhaust, rough idle, and a noticeable sweet diesel smell are classic signs of Black Death injector leaks. Worn seals allow fuel to leak into the combustion chamber, causing incomplete burning and expensive damage over time. This failure is especially common in diesel Mercedes Sprinter vans used for long commercial routes. A quick visual inspection around the injector area combined with a diagnostic scan often confirms the issue before it worsens. Addressing it promptly prevents further contamination of the fuel system and protects surrounding components from unnecessary strain. For more details on body-related repairs, see our RV body shop page.
DEF and DPF System Failures Leading to Limp Mode
Crystallization inside the DEF tank and injector triggers warning messages and forces the van into limp mode engagement. Poor quality DEF fluid speeds up the buildup and leads to restricted exhaust flow. When power is suddenly limited, the safest response is to pull over safely and avoid continued driving that could cause additional damage. Regular system cleaning and use of high-quality fluid help maintain proper operation and reduce the frequency of these episodes. Learn more about related maintenance on our RV maintenance page.
Glow Plug and Cold Start Issues
Cold start hesitation becomes noticeable during cooler mornings along the coast. Faulty glow plugs or corroded electrical connections prevent smooth ignition and place extra stress on the battery. Simple testing of the glow plug circuit identifies failing components quickly. Replacing them restores reliable starting and reduces wear on the starting system. See our RV service page for additional electrical repair information.
Turbo Resonator and Hose Leaks
Whistling sounds under acceleration and noticeable loss of boost point to failing intercooler hoses or the turbo resonator. These leaks reduce engine efficiency and can lead to more serious turbo damage if ignored. Preventive replacement at recommended service intervals keeps the boost system functioning properly and maintains consistent power delivery. Additional information on related repairs is available on our RV roof repair page.
These common Sprinter van problems follow predictable patterns that experienced technicians recognize immediately. Knowing them in advance puts you in control and reduces the anxiety of unexpected breakdowns. A complimentary consultation helps identify potential issues before they leave you stranded.
Why Does Your Sprinter Van Enter Limp Mode So Often?

Limp mode ranks among the most frustrating Sprinter van issues because it removes power exactly when you need it most on Southern California freeways. The sudden reduction in speed and performance creates immediate safety concerns and disrupts tight schedules. Multiple sensors, wiring harness corrosion from coastal air, and DEF system frequently trigger the protective mode. Understanding the common causes removes much of the mystery and helps you respond effectively instead of guessing. For more on related collision concerns, visit our RV collision repair page.
Common Limp Mode Triggers in Mercedes Sprinter Vans
Sensor failures, damaged wiring harnesses, exhaust and emissions related faults, and issues with the transmission or SAM module all contribute to limp mode activation. Each trigger produces slightly different dashboard warnings that guide diagnosis. Additional details on electrical systems can be found on our RV slide-out repair page.
How to Safely Diagnose Limp Mode Without Guessing
Dashboard messages provide valuable clues about the underlying problem. A professional code read reveals the exact source so repairs target the root cause rather than symptoms. Learn more about diagnostic services on our RV fiberglass repair page.
Fast Fixes That Reset and Prevent Recurrence
Targeted repairs on the identified cause restore full power and include preventive measures to reduce future occurrences. Regular inspections of wiring and sensors help catch developing issues early. For additional maintenance options, see our camper repair page.
Understanding limp mode activation takes the mystery out of the experience. Our experienced team uses factory-level diagnostics to identify the exact cause quickly. Handicap Van Repair Shop Ontario. Contact us for a same-day diagnostic appointment and get back to full power with confidence
Sprinter Service A vs Service B: What Is Covered and When You Need Each
Many owners searching Sprinter repair near me remain unsure about the difference between Service A interval and Service B maintenance intervals. These manufacturer-recommended services prevent the majority of common Sprinter van problems when followed consistently. Service A handles basic oil and filter changes while Service B maintenance includes deeper fluid services and inspections that catch emerging issues before they become expensive failures. Proper timing of both services keeps your van operating efficiently and extends its usable life. For more on general maintenance, visit our RV maintenance page.
Full Breakdown of Sprinter Service A
Oil changes, filter replacements, and basic system checks form the foundation of Service A interval. These tasks maintain clean lubrication and prevent premature wear on engine components. Recommended mileage keeps costs predictable in the three hundred fifty to one thousand two hundred dollar range depending on specific needs. Additional service details are available on our RV service page.
What Makes Service B More Thorough
Service B maintenance adds fuel filter and air filter replacement, transmission fluid service, and detailed brake and suspension inspections. The additional work provides broader protection against failures that develop between major intervals. See our truck repair page for related commercial services.
Cost Comparison and Value for Southern California Drivers
Following the correct service schedule proves far less expensive than repairing advanced damage later. Many owners discover that consistent maintenance actually lowers total ownership costs over time. For paint-related services, see our RV paint shop page.
Sticking to the proper service schedule is one of the smartest ways to avoid expensive repairs later. Contact us for a complimentary service interval review tailored to your mileage and usage.
Collision, Body, and Frame Repair for Sprinter Vans
Accidents and parking lot dings happen frequently with high-roof cargo vans navigating busy Southern California streets. When body or frame damage occurs, finding experienced Sprinter repair near me becomes essential for proper restoration. Specialized techniques ensure structural integrity and safety systems function exactly as designed after repairs. Learn more on our RV body shop page.
Frequent Collision Damage Types on Sprinter Vans
High-roof panels and door alignment issues require precise measurement and correction. Frame straightening brings the chassis back to factory specifications using specialized equipment. Additional collision information is available on our RV collision repair page.
Why Specialized Sprinter Body Repair Is Essential
Proper collision repair restores both safety and appearance while maintaining the van’s original handling characteristics. For fiberglass-related repairs, see our RV fiberglass repair page.
Proper collision repair restores both safety and appearance. Contact us for a damage assessment after any incident.
How to Choose the Ideal Shop for Sprinter Van Repair Near Me
With so many options when searching Sprinter repair near me, the decision comes down to expertise, speed, and transparency. Independent specialists often provide faster turnaround and more competitive pricing while delivering quality that matches or exceeds dealer standards when they focus on Sprinter vans. For more on trailer services, visit our trailer repair page.
Dealer vs Independent Repair Comparison
Dealer wait times frequently stretch to ten days or longer with higher hourly rates. Independent shops with dedicated Sprinter experience reduce downtime significantly through better parts availability and streamlined processes. See our Sprinter van repair page for specialized options.
What Questions to Ask Before Scheduling Service
Clear questions about diagnostic methods, parts sourcing, and warranty coverage help separate qualified shops from general repair facilities. Additional details on camper services are available on our camper repair page.
Red Flags to Watch for When Selecting a Shop
Avoid locations that cannot provide detailed written estimates or lack specific Mercedes Sprinter diagnostic tools. For roof-related repairs, see our RV roof repair page.
Choosing the right partner for your Sprinter repair near me needs saves time, money, and frustration. Local Sprinter van repair near me experts with focused experience deliver repeatable results that keep your van generating revenue instead of sitting idle. Contact us to discuss your specific situation.
Prevention Tips to Avoid Typical Sprinter Van Issues
The best repair remains the one you never need. Simple habits and timely maintenance dramatically lower the chance of Black Death injector issues, DEF system problems, and limp mode activation episodes for Mercedes Sprinter van owners throughout Southern California. Consistent attention to fluid levels, filter changes, and visual inspections pays dividends in reliability and lower long-term costs. For more on remodel services, see our RV remodel page.
Seasonal Maintenance Suggestions for Southern California
Summer heat places extra demand on cooling and air conditioning systems. Winter preparation focuses on battery health and glow plug performance to ensure reliable starts during cooler months. Learn more on our RV maintenance page.
Mileage-Based Checklists That Deliver
Following mileage-based checklists tailored to your driving patterns catches wear items before they fail. Additional checklist resources are available on our RV service page.
Quality Parts Over Cheap Alternatives
Using quality replacement parts matched to Sprinter specifications prevents repeat failures and maintains warranty compatibility where applicable. For paint services, see our RV paint shop page.
Consistent preventive care keeps your Mercedes Sprinter performing at its best. Contact us for a complimentary maintenance checklist customized to your van’s usage.
Real Owner Experiences With Sprinter Van Repair Near Me
Hearing how other Mercedes Sprinter van owners solved similar issues helps remove uncertainty. One fleet operator from Irvine described how repeated limp mode episodes at the dealer were resolved in a single visit that also saved over one thousand eight hundred dollars compared to the quoted dealer price. Another camper van owner from Huntington Beach reported that fast injector seal replacement allowed the planned trip to continue without missing any travel days. A third customer from Anaheim highlighted the transparent pricing and same-week scheduling that kept their mobile business operating without interruption. For more customer stories, visit our testimonials page.
What Improvements Can You Expect From Professional Sprinter Van Repair Near Me
After proper fast fixes for frequent Sprinter van troubles, owners usually notice immediate gains in power delivery, smoother idling, improved fuel economy, and the disappearance of warning lights. Long-term benefits include extended vehicle life, fewer roadside incidents, and noticeably lower overall operating expenses. Many report the van feels more responsive and reliable than it had for months prior to service. Handicap Van Repair Shop Ontario. For additional photos of completed work, see our photos page
Typical Concerns About Sprinter Van Repair Near Me and How They Are Solved
Many owners worry about hidden costs, long wait times, and whether independent shops can truly match dealer-level quality. Transparent flat-rate pricing, same-week scheduling, readily available parts, and clear satisfaction guarantees directly address these concerns. Local Sprinter repair near me experts prioritize straightforward communication so you understand the scope and timeline from the first conversation. For more on video content, see our videos page.
Locations We Serve Throughout Southern California
Sprinter van repair near me is readily available throughout Southern California including Anaheim, Santa Ana, Irvine, Huntington Beach, Garden Grove, Fullerton, Orange, Costa Mesa, Mission Viejo, Westminster, Newport Beach, Buena Park, Lake Forest, Tustin, Yorba Linda, Fountain Valley, Laguna Niguel, San Clemente, La Habra, Cypress, Rancho Santa Margarita, Seal Beach, Placentia, Brea, Stanton, San Juan Capistrano, Laguna Hills, Laguna Beach, Aliso Viejo, Villa Park, Laguna Woods, Dana Point, Los Alamitos, La Palma and the broader Los Angeles County, Inland Empire, Riverside County, San Bernardino County, Ventura County, and San Diego County areas near the 5 and 91 freeways. For a full list of cities served, visit our contact page.
Common Questions About Sprinter Van Repair Near Me
What are the most typical Sprinter van troubles?
The most common Sprinter van troubles include Black Death injector leaks, DEF and DPF system failures, glow plug issues, turbo hose leaks, and limp mode engagement activation. These issues typically develop in vans with higher mileage and heavy daily use across Southern California routes. Early detection through regular inspections prevents small concerns from growing into costly repairs. For more information see our Sprinter van repair page.
How much does Sprinter repair near me usually cost?
Costs for Sprinter van repair near me range from three hundred fifty dollars for routine maintenance to twelve thousand five hundred dollars for major collision or transmission work. Transparent flat-rate pricing allows owners to budget accurately. For more details see our RV collision repair page.
What is included in Sprinter Service A versus Service B?
Service A interval covers essential oil and filter changes along with basic system checks. Service B maintenance expands to include fuel and air filter replacement, transmission fluid service, and detailed brake and suspension inspections. Following both intervals on the manufacturer schedule prevents the majority of common problems. See our RV maintenance page for more.
Why does my Sprinter van keep going into limp mode?
Limp mode activates to protect the engine and emissions system when sensors detect faults in wiring, DEF systems, or other critical components. A professional diagnostic scan identifies the precise trigger so the correct repair can be performed. See our RV service page for diagnostic information.
Is independent Sprinter repair near me better than the dealer?
Independent shops specializing in Sprinter vans frequently offer shorter wait times, more competitive pricing, and personalized service while maintaining high technical standards. Many owners report significant savings and improved communication compared with traditional dealer experiences. For more see our Sprinter van repair near me page.
What is the recommended service interval for my Sprinter van in Southern California?
Service frequency depends on mileage and driving conditions. Most owners benefit from Service A interval every ten thousand to twenty thousand miles and Service B maintenance around forty thousand miles. Local stop-and-go traffic near major freeways may require slightly more frequent attention to fluids and filters to maintain peak performance. See our RV maintenance page for details.
What triggers Black Death in Sprinter vans?
Black Death is caused by worn injector seals that allow fuel to leak into the combustion chamber. Early detection prevents major damage. For related body work see our RV body shop page.
Is Sprinter collision damage repairable?
Yes, specialized Sprinter van collision repair restores safety and appearance when performed by experienced technicians. See our RV collision repair page for more information.
Is shuttle service available during Sprinter repairs?
Shuttle service and loaner options are available for qualifying repairs to keep you mobile. Contact us for details on our contact page.
Which shop is best for Sprinter van repair near me?
Shops with dedicated Sprinter experience, transparent pricing, and fast turnaround are ideal. For more options see our Sprinter van repair page.
We Can Help! Contact Us Today.
When common Sprinter van problems arise, having trusted local experts makes all the difference. OCRV Center specializes in Sprinter repair near me for owners and fleets across Southern California. With transparent pricing between three hundred fifty and twelve thousand five hundred dollars depending on the repair, same-week scheduling, and a satisfaction guarantee, we help eliminate the stress of downtime and deliver reliable results that protect your investment. Located at 23281 La Palma Ave. Yorba Linda CA 92887, call (714) 909-1444. OCRV Center has supported Southern California Mercedes Sprinter owners with expert service, providing the emotional relief of knowing your van is in capable hands and the logical confidence that comes from proven, cost-effective repairs that keep your business or lifestyle moving forward without interruption or uncertainty.
According to the Federal Motor Carrier Safety Administration, proper commercial vehicle maintenance significantly reduces roadside breakdowns. For more information on collision services, visit our RV collision repair - Handicap Van Repair Shop Ontario page
OCRV Center
Address: 23281 La Palma Ave Yorba Linda, CA 92887Phone: (714) 909-1444
Email: art@ocrvcenter.com
OCRV Center
Sprinter Van Repair Near Me Ontario, CA
Sprinter Van Service Near Me Ontario, CA
Sprinter Van Service Near Me Ontario, CA
Mobility Van Repair Near Me Ontario, CA
Van Repair Ontario, CA
Handicap Van Lift Repair Ontario, CA
Wheelchair Van Repair Shops Near Me Ontario, CA
Van Repair Shop Near Me Ontario, CA
Rust Repair Sprinter Van Ontario, CA
Wheelchair Van Repair Shops Near Me Ontario, CA
Sprinter Repair Shop Near Me Ontario, CA
Van Repair Shops Near Me Ontario, CA
Sprinter Repair Shops Near Me Ontario, CA
Handicap Van Repair Ontario, CA
Sprinter Van Repair Ontario, CA
Mercedes Sprinter Van Service Near Me Ontario, CA
Wheelchair Van Repair Shops Near Me Ontario, CA
Van Customization Near Me Ontario, CA
Rust Repair Sprinter Van Ontario, CA
Mercedes Sprinter Van Service Ontario, CA
Mercedes Sprinter Van Repair Ontario, CA
Mercedes Sprinter Van Service Near Me Ontario, CA
Van Customization Near Me Ontario, CA
Mercedes Sprinter Van Repair Ontario, CA
Mercedes Sprinter Repair Near Me Ontario, CA
Rust Repair Sprinter Van Ontario, CA
Sprinter Repair Shop Near Me Ontario, CA
Van Repair Ontario, CA
Van Repair Shop Near Me Ontario, CA
Mercedes Benz Sprinter Repair Ontario, CA
Handicap Van Repair Shop Ontario, CA
Handicap Van Repair Near Me Ontario, CA
Van Customization Near Me Ontario, CA
Sprinter Van Service Centers Ontario, CA
Handicap Van Repair Ontario, CA
Wheelchair Van Lift Repair Near Me Ontario, CA
Handicap Van Repair Shop Ontario, CA
Handicap Van Repair Ontario, CA
Mobility Van Repair Near Me Ontario, CA
Wheelchair Van Repair Shops Near Me Ontario, CA
Sprinter Van Repair Shop Near Me Ontario, CA
Van Repair Ontario, CA
Sprinter Repair Shop Near Me Ontario, CA
Rust Repair Sprinter Van Ontario, CA
Sprinter Repair Near Me Ontario, CA
Sprinter Repair Ontario, CA
Sprinter Van Repair Near Me Ontario, CA
Handicap Van Repair Near Me Ontario, CA
Mercedes Sprinter Van Repair Ontario, CA
Sprinter Van Service Near Me Ontario, CA
Sprinter Repair Shop Near Me Ontario, CA
Handicap Van Repair Ontario, CA
Wheelchair Accessible Van Repair Ontario, CA
Handicap Van Repair Shop Ontario, CA
Mercedes Sprinter Van Service Near Me Ontario, CA
Van Repair Ontario, CA
Mercedes Sprinter Van Service Near Me Ontario, CA
Sprinter Van Service Near Me Ontario, CA
Sprinter Van Service Near Me Ontario, CA
Mercedes Sprinter Repair Near Me Ontario, CA
Sprinter Van Repair Ontario, CA
Sprinter Van Repair Ontario, CA
Rust Repair Sprinter Van Ontario, CA
Wheelchair Accessible Van Repair Ontario, CA
Van Repair Ontario, CA
Van Repair Shops Near Me Ontario, CA
Sprinter Repair Shops Near Me Ontario, CA
Sprinter Repair Shop Near Me Ontario, CA
Handicap Van Repair Ontario, CA
Handicap Van Repair Near Me Ontario, CA
Rust Repair Sprinter Van Ontario, CA
Sprinter Repair Shop Near Me Ontario, CA
Sprinter Repair Shop Ontario, CA
Sprinter Van Repair Ontario, CA
Mercedes Sprinter Van Repair Near Me Ontario, CA
Sprinter Repair Shops Near Me Ontario, CA
Handicap Van Repair Ontario, CA
Mercedes Sprinter Van Service Ontario, CA
Find A Good Local Seo Marketing Ontario, CA
Near Seo Services Pricing Ontario, CA
OCRV Center
Van Repair Shops Near Me Ontario, CA
Handicap Van Repair Ontario, CA
Table of Contents
- – OCRV Center
- – What Are the Most Recurring Sprinter Van Chall...
- – Black Death Injector Issues and Blue Smoke
- – DEF and DPF System Failures Leading to Limp Mode
- – Glow Plug and Cold Start Issues
- – Turbo Resonator and Hose Leaks
- – Why Does Your Sprinter Van Enter Limp Mode So ...
- – Common Limp Mode Triggers in Mercedes Sprinte...
- – How to Safely Diagnose Limp Mode Without Gues...
- – Fast Fixes That Reset and Prevent Recurrence
- – Sprinter Service A vs Service B: What Is Cover...
- – Full Breakdown of Sprinter Service A
- – What Makes Service B More Thorough
- – Cost Comparison and Value for Southern Califo...
- – Collision, Body, and Frame Repair for Sprinter...
- – Frequent Collision Damage Types on Sprinter Vans
- – Why Specialized Sprinter Body Repair Is Essen...
- – How to Choose the Ideal Shop for Sprinter Van ...
- – Dealer vs Independent Repair Comparison
- – What Questions to Ask Before Scheduling Service
- – Red Flags to Watch for When Selecting a Shop
- – Prevention Tips to Avoid Typical Sprinter Van ...
- – Seasonal Maintenance Suggestions for Southern...
- – Mileage-Based Checklists That Deliver
- – Quality Parts Over Cheap Alternatives
- – Real Owner Experiences With Sprinter Van Repai...
- – What Improvements Can You Expect From Professi...
- – Typical Concerns About Sprinter Van Repair Nea...
- – Locations We Serve Throughout Southern California
- – Common Questions About Sprinter Van Repair Nea...
- – What are the most typical Sprinter van troubles?
- – How much does Sprinter repair near me usually...
- – What is included in Sprinter Service A versus...
- – Why does my Sprinter van keep going into limp...
- – Is independent Sprinter repair near me better...
- – What is the recommended service interval for ...
- – What triggers Black Death in Sprinter vans?
- – Is Sprinter collision damage repairable?
- – Is shuttle service available during Sprinter ...
- – Which shop is best for Sprinter van repair ne...
- – OCRV Center
Latest Posts
Trailer Awning Replacement Montclair
Eastvale Trailer Window Replacement
Mobility Van Repair Near Me Walnut
More
Latest Posts
Trailer Awning Replacement Montclair
Eastvale Trailer Window Replacement
Mobility Van Repair Near Me Walnut